
How to Make Origami Paper Stars
- Dec 3, 2025
- 5 min read
I love making decorations at Christmas and these paper stars have become a bit of a traditional Christmas craft session in my house. I learnt how to fold them a few years ago when I was commissioned to make decorations for the Hay Winter Festival. I made these stars from all sorts of different papers including book pages, music and even a large wall map. They are quite easy to make and once you're in the flow of the repeated steps they take no time at all! Here are the instructions for how to make an origami paper star so you can have a go yourself.


WHAT YOU WILL NEED:
To make these paper stars you will need a square sheet of paper and some scissors. I am using sheets of A4 which I will turn into squares (this step is included in the instructions below) and I've chosen paper with a patterned side and a plain side to help you see the folds more clearly. You can use any paper for this but I would recommend you don't use card as it won't fold very neatly because of its weight.
When finished, the stars will be around half the size of the square of paper you started with.
There are two stages to the stars; the first part is to turn your square into a pentagon and the second part is to fold the pentagon into a star. I've included images with the step-by-step instructions and then at the bottom of each stage is a video so you can see the folding in action! You can click on the images to make them larger if you need to see the folds more clearly. If you would rather find a pentagon template online that you can print and cut out, that will also work, just skip to the star folding instructions when your pentagon is ready.
STAGE 1: MAKING A PENTAGON


Start by folding a corner over until it lines up with the opposite side of the paper. cut along the edge of the paper to remove the excess and unfold the triangle. you now have a square.


Fold your square in half, bringing the bottom edge up to meet the top edge.
Fold the bottom left corner up to meet the top edge then unfold it again.
Fold the top left corner down to meet the bottom edge and then unfold this too.


You should now have a cross on the left hand side of your rectangle made by the two folds you just made.
Take the bottom right corner and bring it up to meet the centre of the cross, folding the paper.
Fold this top section back on itself to meet the right edge, creating an ice cream cone shape and fold flat.


Fold the bottom edge (A) up to meet the middle edge (B). It will look like a bit of a wonky heart! This fold will make a new crease. It doesn't follow the creases that made up the cross in steps 3 and 4, it creates a new crease that's slightly to one side.


Turn the folded paper over. Fold your shape in half, lining up the left edge with the right edge of the heart. You should now have a flat ice cream cone type shape.
Cut the top of your cone off, following the edge of the top fold of paper.
Unfold the paper to reveal your pentagon.
MAKING A PAPER PENTAGON VIDEO:
STAGE 2: MAKING THE PAPER STARS
Now you have your pentagon you're ready to start folding it into a star!

If you have a good side to your paper, place this side down to make sure it is seen when the star has been folded.


Start folding your pentagon in half, from side point to side point so the crease run from the top point to the centre of the bottom edge. Unfold your pentagon, turn it clockwise to the next point and repeat this step until you have done it for all 5 points. If you have made your pentagon by folding it from a square you will already have creases along these lines but they won't all be folded in the same direction. You will still need to fold the pentagon in half for each of the 5 points, to make sure your creases fold in the same direction and the star collapses into the right shape at the end.


Now you should have an unfolded pentagon with creases from each point to the centre of the opposite edge. Fold up the bottom edge until the two corners meet the two creases that come down from the side points. Unfold the pentagon and turn it clockwise, repeating this step for each of the 5 sides. You should now start to see a star shape in the creases of your pentagon.


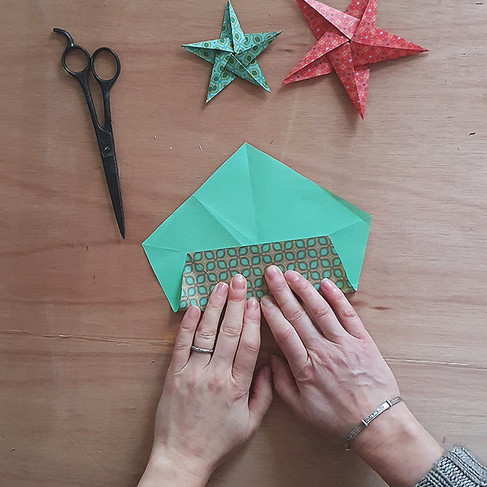
Fold the left side of the pentagon along the crease you just made, into the middle. At the same time fold up the bottom edge along its crease, making the corner of the star stand up from where the two creases meet. Fold this corner over to the left and flatten it.
Unfold the paper to a pentagon again, turn it clockwise to the next point and repeat the step. Do this for all 5 points of the pentagon.


Take your unfolded pentagon and start to pinch each of the points in half and push them down towards each other. The paper should start collapsing into a star shape.


Turn the star over.
Fold each point in half, lining the right edge long the centre so the corners of the pentagon meet in the middle of the stars centre. The last point will need a bit of extra fiddling as it will be partially tucked under the fold of the first point.
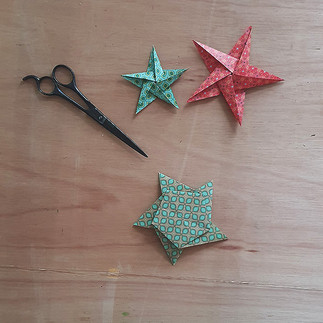
Now your star is complete!
MAKING A PAPER STAR VIDEO:
If you want to hang it you can use a hole punch and some festive string to make a little loop for it to hang from. I've also tied them in a row to a length of string to make garlands that hang over the doorways at Christmas. Below is one of the windows at Hay Castle where I hung different sized stars on different lengths of string so they looked like they were floating together in the night sky.
If you want to find more things you can do with paper, head to my online courses page where I've got other tutorials and online learning.


Comments